Enhance your Flutter + Copilot outputs with Copilot Instructions
•5 min read
Many developers are unaware that you can use copilot instructions—similar to those in Cursor or Windsurf—to enhance your AI results. These rules help make your AI more efficient and effective. In this post, I'll show you how to leverage Copilot instructions to improve your outputs.
What are Copilot Instructions?
Copilot instructions are simple, easy-to-understand rules that guide Copilot to produce better results. You can use them in any programming language. For example, you can set rules for naming conventions, code structure, and even specific patterns you want Copilot to follow.
Rules Examples
Here are some examples of rules you can set:
- Use `Either` for error handling.
- Use `async` and `await` for asynchronous code.
- Prefer `const` constructions when possible.
- Use clean architecture principles.
- Always inject dependencies on `bloc` or `cubit` constructors.
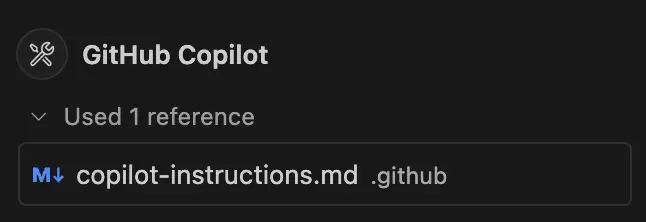
Whenever you write a prompt or a comment, Copilot uses these instructions as context to generate its outputs.

Setup Copilot Instructions
There are many ways to set up Copilot instructions. You can do it manually, automatically, or even use a combination of both. The choice depends on your preferences and the needs of your team.
Manual Setup
To add Copilot instructions manually, create a .github/copilot-instructions.md file in your repository. Add your preferred rules in Markdown format.
.github/
└── copilot-instructions.md
You can start with some basic rules and expand as needed.
- ✅ Simple, straightforward setup
- ✅ No extra dependencies required
- ❌ Updates must be performed manually
Automatic Fetch Setup
You can also fetch the copilot-instructions.md file from a public or private remote repository to keep your rules up to date. This is especially important in organizations or small teams, where maintaining consistency in coding standards and AI guidance is crucial. By centralizing your Copilot instructions, you ensure that everyone benefits from the latest best practices and team-specific rules, reducing confusion and improving collaboration. Automated updates help all contributors stay aligned without manual overhead.
Using Melos
Melos is a tool for managing Dart and Flutter monorepos. It can also be used to automate tasks in your repository. To set up automatic fetching of the copilot-instructions.md file, add the following to your melos.yaml file:
command:
  # Called after `melos bootstrap` or `melos bs`
  hooks:
    bootstrap:
      post:
        - get_instructions

  # Create the directory if it doesn't exist
  # Fetch the instructions file from the remote repository
  scripts:
    get_instructions: |
      mkdir -p .github
      curl -L -o .github/copilot-instructions.md https://raw.githubusercontent.com/user/flutter-ai-rules/refs/heads/main/rules/rules.md
This way, every time you run melos bootstrap, the updated copilot-instructions.md file will be downloaded from the remote repository.
- ✅ Simple, straightforward setup
- ✅ Rules always up to date
- ✅ Easy to share across teams
- ❌ Extra dependencies and setup required (Melos)
Using Makefile
If you prefer not to use Melos, you can achieve the same result with a simple Makefile file. Create a Makefile in your repository root and add the following:
get:
	flutter pub get
    # Create the directory if it doesn't exist
	mkdir -p .github
    # Fetch the instructions file from the remote repository
	curl -o .github/copilot-instructions.md https://raw.githubusercontent.com/user/flutter-ai-rules/refs/heads/main/rules/rules.md
This will download the copilot-instructions.md file from the remote repository every time you run make get.
- ✅ Simple, straightforward setup
- ✅ Rules always up to date
- ✅ Easy to share across teams
- ✅ No extra dependencies required
SSH Key for Private Repositories
If you want to fetch the copilot-instructions.md file from a private repository, you can use an already configured SSH key.
Following the makefile example:
get:
	flutter pub get
	mkdir -p .github
    # Clone the repository using SSH into a temporary directory
    git clone --depth 1 git@github.com:user/flutter-ai-rules.git temp_dir
    # Copy the instructions file to the target location
    cp temp_dir/rules/rules.md .github/copilot-instructions.md
    # Clean up the temporary directory
    rm -rf temp_dir
This will clone the repository using SSH and copy the copilot-instructions.md file to your local repository.
- ✅ Secure access to private rules
- ✅ Rules always up to date (from the private source)
- ✅ Easy to share within authorized teams
- ✅ No additional dependencies beyond standard tools (
git,ssh) - ❌ Requires pre-configured SSH key access to the private repository
- ❌ Slightly more complex setup than public fetching
Conclusion
By adopting copilot instructions, you empower yourself and your team to achieve more consistent, high-quality code with less friction. Clear, shared rules help Copilot understand your expectations, leading to smarter suggestions and fewer corrections. This approach is particularly valuable for teams and open-source projects, where maintaining coding standards and onboarding new contributors can be challenging.
Remember, better contexts lead to better outputs.
Take a few minutes to set up rules in your repositories; the investment pays off quickly in improved productivity and code quality. For further details and advanced configuration, refer to the GitHub documentation.
Happy coding! 🚀